4 TIPS FOR SHOOTING IN DIRECT LIGHT

Shooting in direct light scares me, haha! Mostly because I prefer even soft light. But direct light forces me to think differently... it stretches me, it pushes me out of my comfort zone. While in Colorado I had the pleasure of taking photos of lots of pretty things and lots of pretty people. Beth graciously allowed me to capture some style photos for her, which was so fun! I could take pictures of Beth everyday. :) We were all together taking in the beautiful scenery and the time of our photo shoot fell about mid-day.
I didn't want the mid-day sun to detour me, but I knew it would be tough. One of these days I should spend some time just snapping photos in direct sun light and see how I feel about it... I'm always desperately looking for the best soft light around.
TIPS FOR SHOOTING IN DIRECT LIGHT
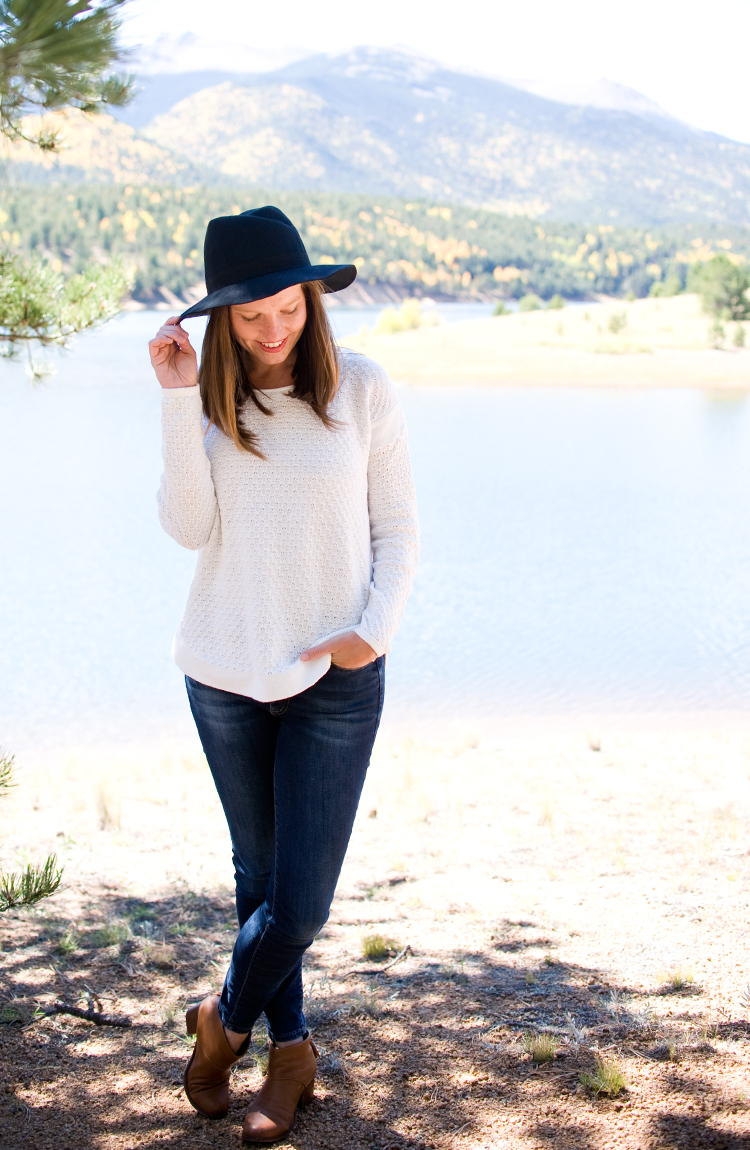
LOOK FOR SHADE: My first instinct when shooting in direct light is to look for shade. Shade provides soft even light, allowing your subject to be evenly lit. When looking for shade try to find areas with pockets of open sky. Once you find the area in which you want to shoot, position your subject just on the edge of the shade with open sky behind you (the photographer.) This will insure you're subject's face is nice and bright. For this particular shoot, with Beth, I totally forgot to find open pockets of sky behind me to help with light. I still love Beth's photos, but there is always room for improvement, right? ;)
OVEREXPOSE: When you are shooting in the shade with direct light you almost always have to overexpose to make sure your subject is properly exposed. When you're looking through your view finder and reading your meter, your meter is going to read the light for the overall photo and background. That means your camera will work to get the background properly exposed and your subject will be too dark. Take a few test shots to find the best exposure. For these particular shots I overexposed by at least 4 stops and I brought the exposure up even more in post processing.


USE STYLE ITEMS TO YOUR ADVANTAGE: Because Beth was wearing a hat in these photos, regardless of where she stood, her face would almost always be well shaded. If you find yourself in direct light, but shade is limited think about what style items you may be able to use to your advantage.
POST PROCESSING: I think one thing that new photographers get discouraged by is seeing their photos sooc (straight out of camera,) and they aren't what they were hoping for. Guys, nearly all of my photos sooc are muddy. They are flat and kind of boring, haha. Most photos come to life in post processing. Our job never ends at the snap of the shutter, we have to develop them too. Keep in mind that your first pass of processing may not be your last. I processed all of these photos for Beth, but after they had sat for a few days and I began to prepare this post I felt like the photos needed a second pass. This isn't always the case, but this style of photos where the background is brighter then the foreground and I'm working to properly expose my subject... sometimes a second pass is needed.

I think every photographer will find their sweet spot when it comes to their preferred lighting, style, and editing. I find so much encouragement in knowing that each shoot is only one shoot and there are many more shoots ahead. I loved doing this shoot with Beth because she is so lovely and while I was struggling with light, she was so sweet and encouraging. I want to fly to Colorado and take photos of Beth all the time. What are some of your surefire tips for shooting in direct light. xoxo. Samantha