
THE ARCHIVE
DIY GUEST ROOM BASKET

For the first time ever I made a guest room basket. When Caitlin came to visit I thought it would be fun and welcoming to put together a little something for her room. And for the first time I actually had fun goodies to put inside. It was a win win situation! I think guest room baskets are the cutest and I loved being able to gather items that I thought would be useful.

When I stay at other people's homes I always find myself either hungry or thirsty and sometimes I just need some time alone. I thought that creating a basket to meet those needs would be a great starting point.

WHAT YOU'LL NEED
1.) Basket
2.) Fabric for lining the basket
3.) Goodies for basket
WHAT'S IN MY BASKET
1.) Fruit snacks
2.) Protein Bars
3.) Water
4.) Bath and Body shower gel and spray.


I filled my basket with all the goodies and had it ready to go by the time Caitlin arrived. I love the idea of creating a special guest room basket for all my guests and I can't wait to start creating them to include some of their favorite items. Do you have any guests coming that you can create a guest room basket for?
DIY CUSTOM CORK BOARDS

I have really been wanting to add some cork boards to our office. Two reasons I really wanted cork boards. One, really wanted to be able to pin lots of fun mail I get from friends. I love snail mail and while I don't keep it forever I wanted a place to glance over and appreciate it. Two, I really wanted to use the cork boards in an attempt to create a mood board for Elah Tree, which I'm really pumped about.

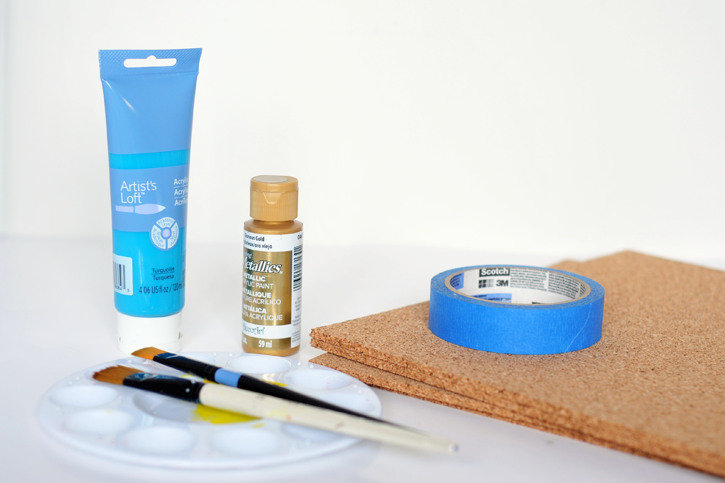
I knew from the beginning that when I found my cork boards that I wanted to be able to customize them and I'm always looking for ways to complete fun easy projects. When it comes to cooking and projects I like quick and simple. Probably not always the best motto, but those are my favorite kinds of projects. For these custom cork boards all I needed was painters tape, paint, paint brushes, a paint pallet, and the cork boards of course.

First things first, decide what kind of design you want on your cork boards. At first I had a crazy design with tape lines every where. Whenever I do projects as I'm working I always ask Tyler his thoughts. When I showed him my crazy tape lines he suggested I go with something a little more simple and more aesthetically pleasing. Tyler has a great eye for those kind of things and I'm always grateful when he's able to teach me and help me through projects.
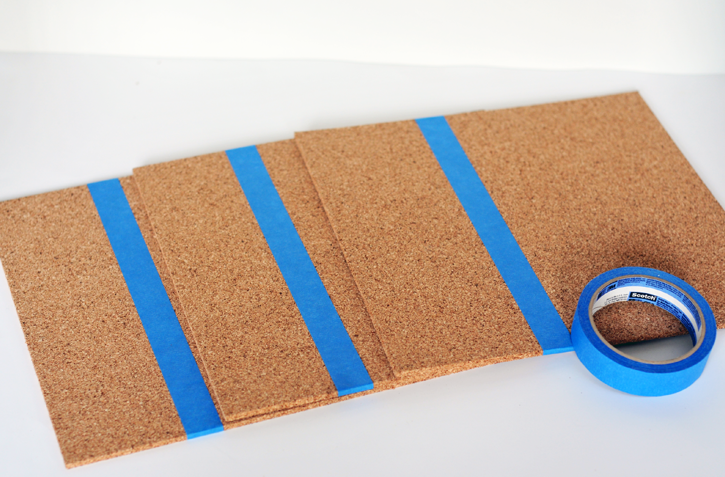
We decided on a simple design using two different colors. With out design in place I started painting. I painted a turquoise blue to one section of each of my cork boards and applied multiple coats after drying. Once I was finished with the blue I added a metallic gold to the smaller section of each cork board. This project was a great project to work on while doing other things. I could paint one coat, step away from it to do something else, and then go back. Tip: Remember when painting to paint the side of the cork board to that the paint goes all the way around.


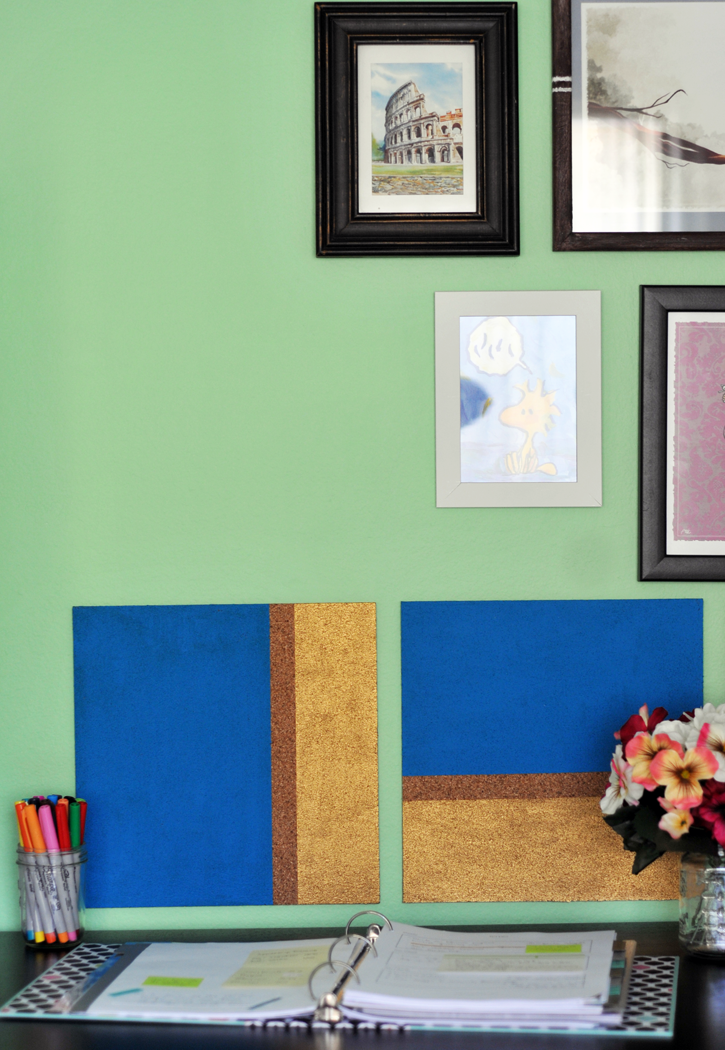
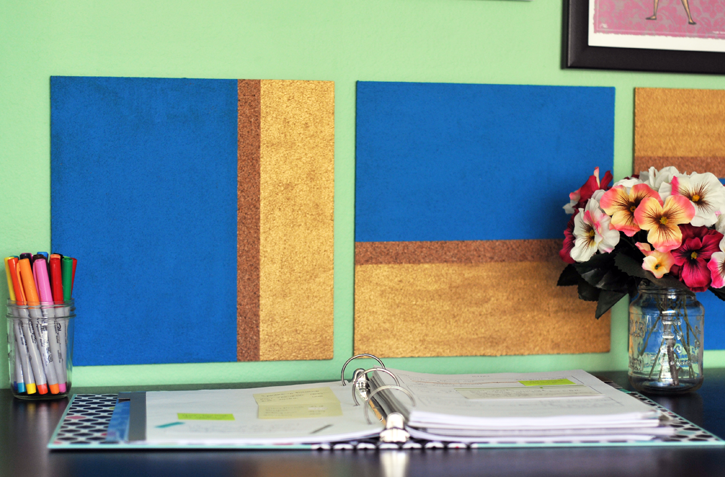
I really love how these cork boards turned out! They are so fun and they are perfect for what I had in mind for them. The hardest part was actually finding a place for them in our office without moving any other art pieces. I decided putting them right over my desk would work great. Having them right above my desk makes it easy to add items to them and I love how they have kind of become a part of my desk.
These kinds of projects really are my favorite. I love being able to take supplies I already have to create something new. For this project all I had to pick up was the cork boards, which were super cheap. What are your favorite kinds of projects? Do you think you'll give these custom cork boards a try?
DIY PAINTED PLANTERS
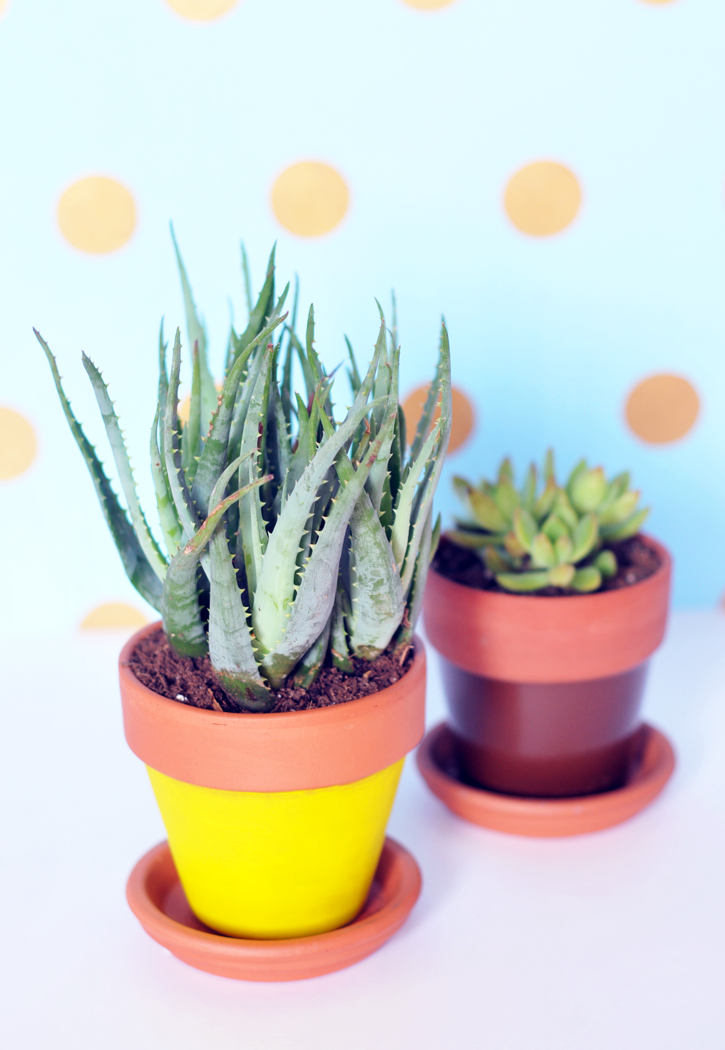
Tyler and I have been on a recent color kick. As in, we need more color, so we have been trying to add pops of color around our home. Tyler has been loving the color yellow and when we picked up a new succulent plant we decided to add a little color by painting the planter yellow.

These are my favorite kinds of projects because they are so easy, but the result is so great. Supplies needed; planter, paint of choice, paint brush, and paint pallet.
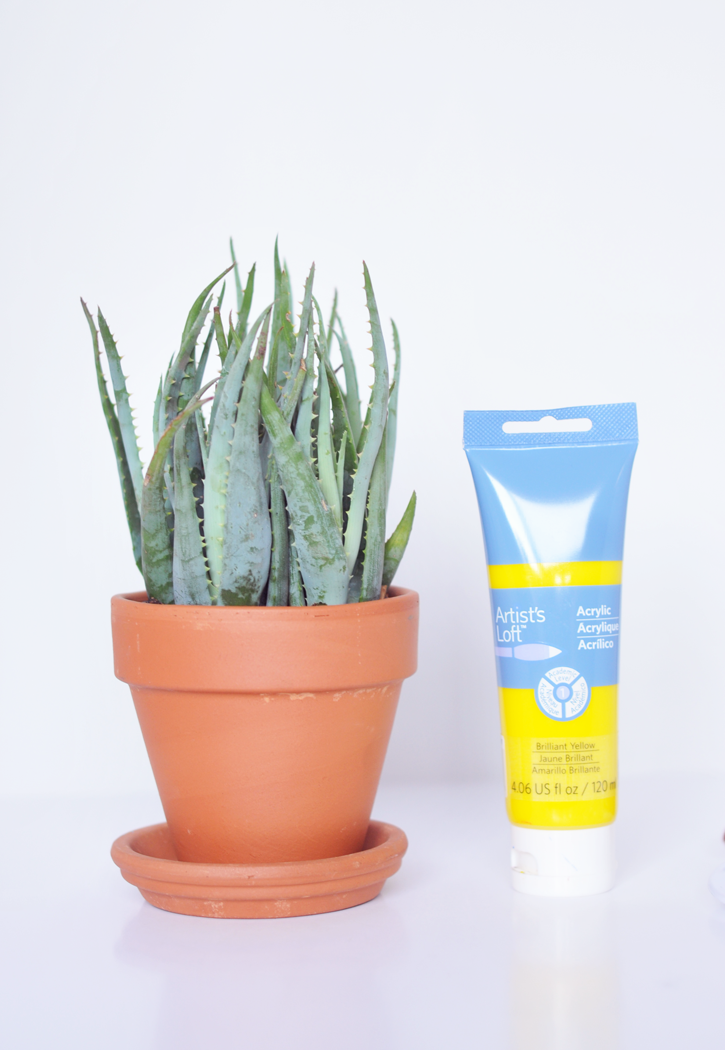
If you're feeling adventures you can paint on any kind of design you like. We loved the idea of solid block coloring so we decided on simply painting the base yellow. This particular paint job took multiple coats. We also decided not to tape off the top and instead took our time painting near the top. Which we're still working on perfecting.


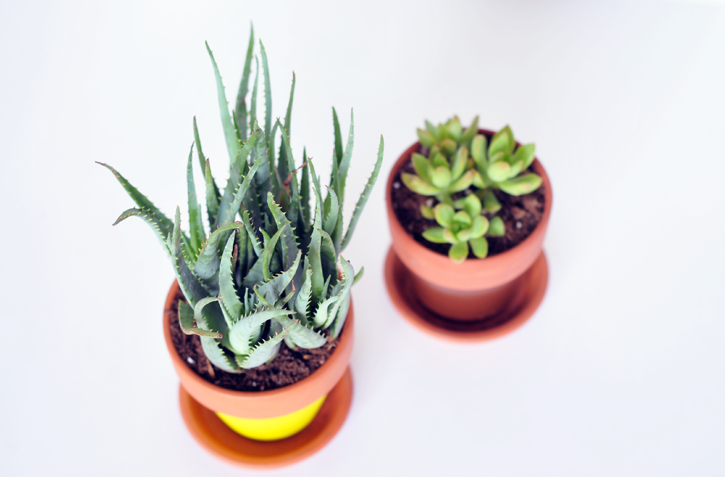
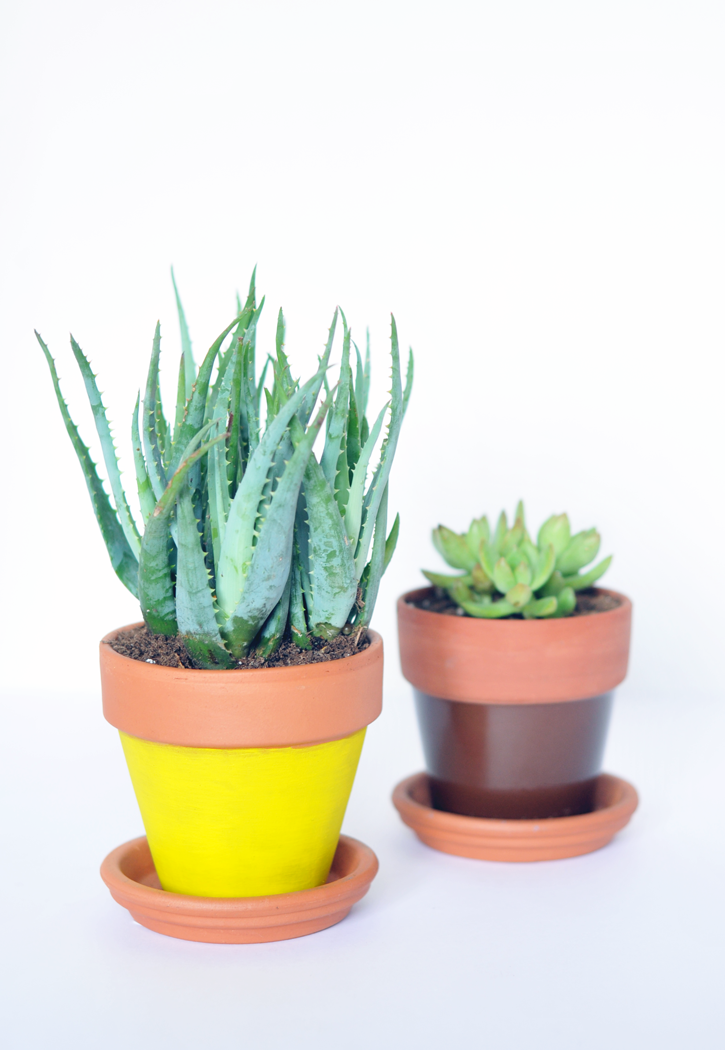
This planter makes me want to paint more. I really enjoy simple projects that can be completed on a whim. Do you have an planters you could add some paint too?
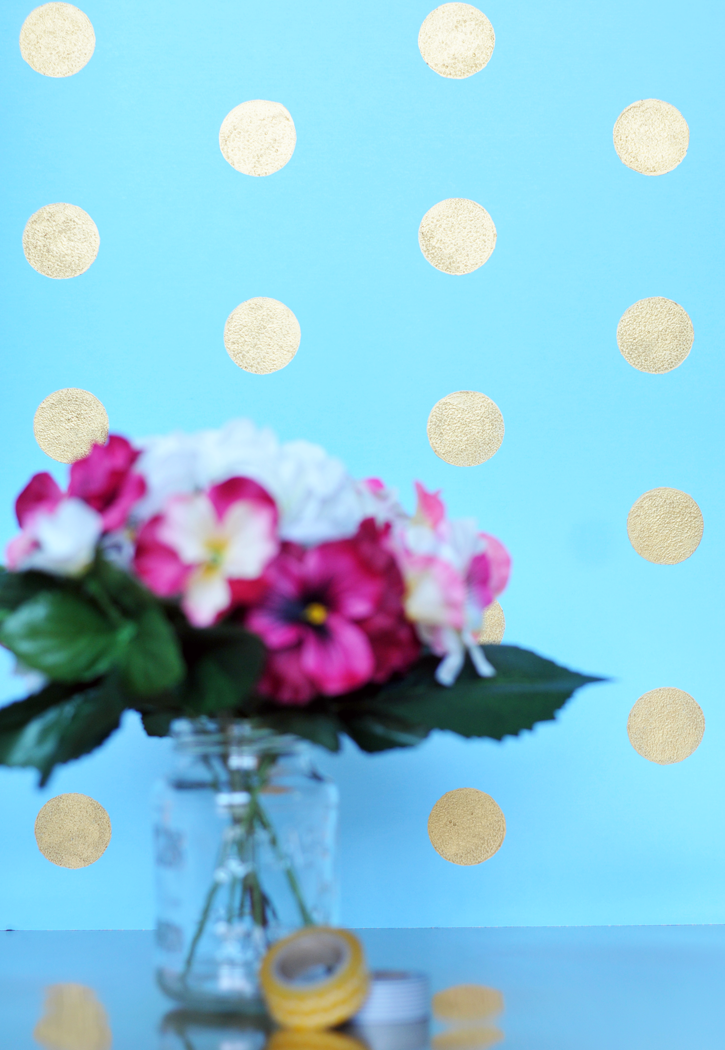
DIY POLKA DOT PHOTO BACKDROP

I love taking photos, styling photos and making things pretty. Over time I have created a collection of photo backdrops. The most common items I use are canvases, foam boards, fabric, and bamboo. Recently, I found myself wanting to add more color and I was inspired to create a new photo backdrop.

This photo backdrop is so easy.
SUPPLIES
- Colored form board
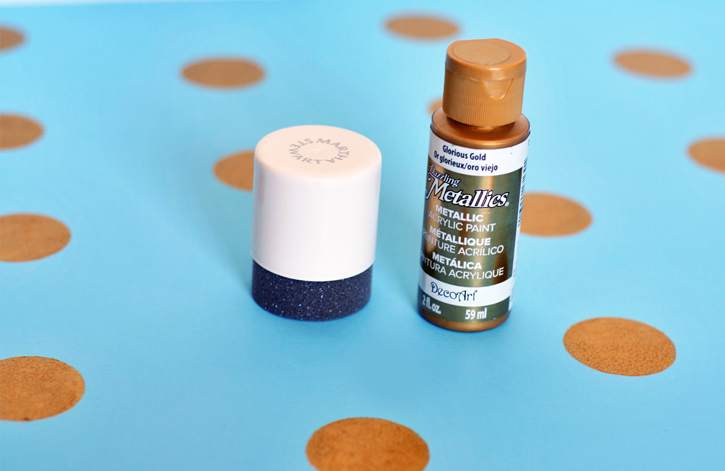
- Paint of choice
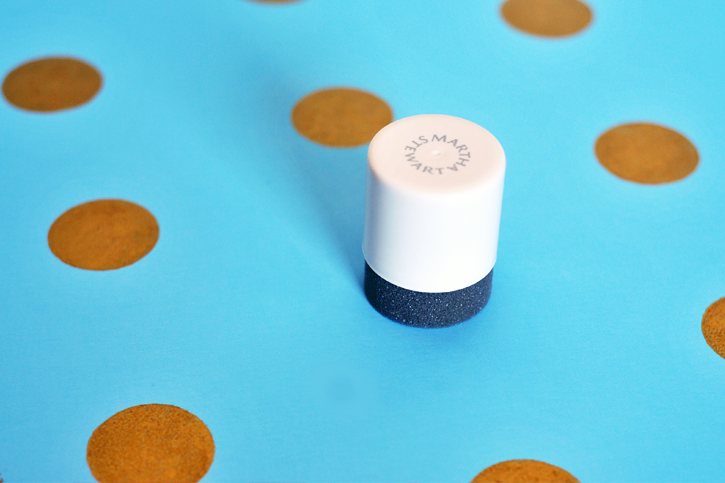
- Sponge paint dabbers
- Paint brush
- Pencil
- Ruler.
METHOD
I picked out a sky blue foam board, gold metallic paint, and decided to do a polka dot backdrop. Before you start painting determine what size polka dots you would like and then mark the board with a pencil and ruler. Tyler determined the spacing for our polka dots and marked the foam board. All of our polka dots were in an ordered pattern and equal distance apart. You can do this or you can choose a more sporadic design.

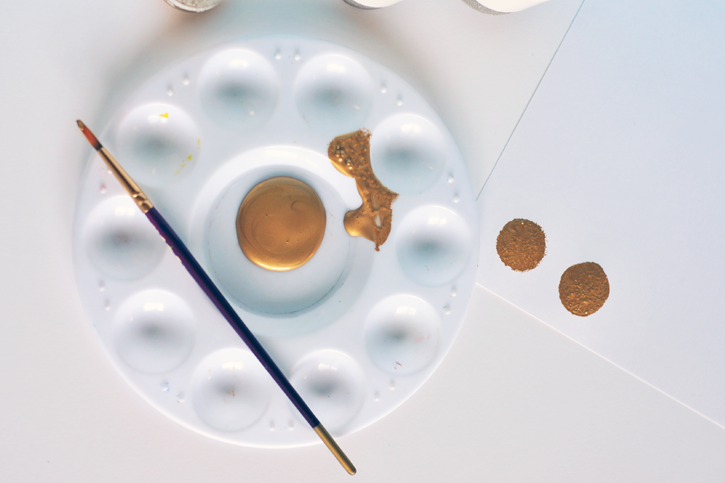
After your foam board is marked and ready, test your paint and dabbers by practicing on scrap paper. We experimented with a few different techniques for application, but found that pressing down and turning just slightly worked best. The paint brush is used to remove access paint from the dabbers before applying to the foam board.

Once you're done testing and determining your technique, your ready to go. Use the dabbers, paint, and paint brush to add polka dots to your foam board. Once you're finished, let the polka dots dry. Be careful when applying the polka dots to not accidentally brush or smear another painted polka dot.
Once your polka dots are dry you've got a new backdrop! I'm so excited about this new addition to my photo backdrops. It's so fun, adds tons of color and can be used for so many things!
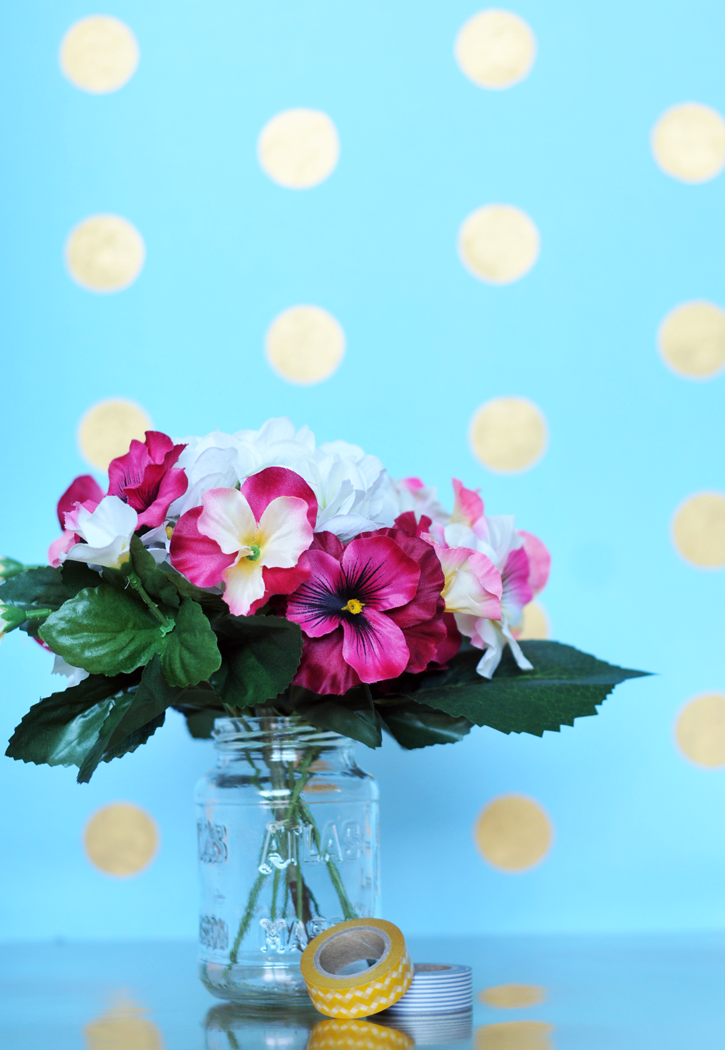

This has been one of my favorite projects as of late. It's really simple and really fun. You color combinations are endless as well. Are you ready to create your own photo backdrop?